Selfies for Crossdressers — Part 8 (Conclusion).

If in doubt, keep it simple.

Many people are satisfied with composing every image on their phone as they take the photograph, but generally you can crop and create a stronger image by using a simple editing tool and working on the image after it’s been taken. Finding the right shape in the frame, perhaps editing it square for Instagram, or even changing the image radically and cropping down to a specific section of the photograph is all possible with any number of downloadable photo editing tools.

Changing the crop of the image lets you find the image within the image. This can make the difference between an average pic, and an amazing picture. Some people have a real knack for finding a better image simply by changing the crop of the picture.

There are also some post production tools that are particularly useful for crossdressers. I am a fan of InstaBeauty or MakeupPlus, which allow you to manipulate the image a little and crop and tidy things up. Generally good composition on your camera or phone means giving a little extra space for cropping and maybe straightening the image up a little.

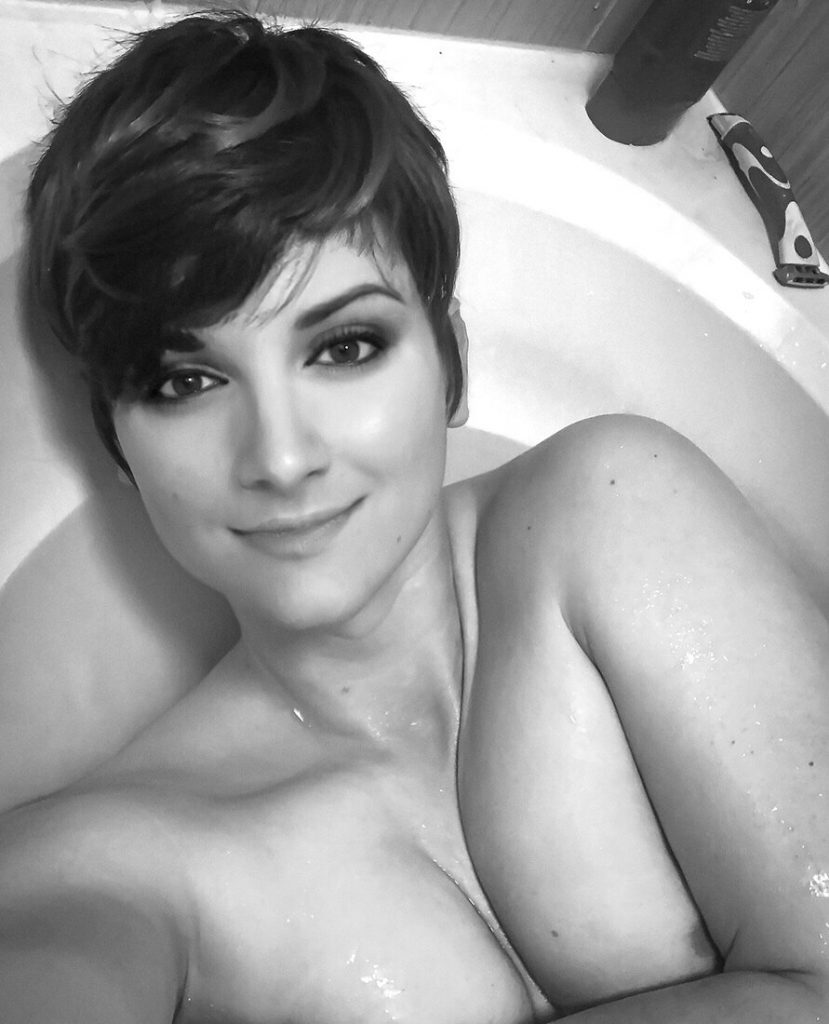
An editing tool like InstaBeauty or MakeupPlus give you the chance to adjust color, manipulate eyes, lips and nose, and add some makeup effects. Don’t think of this as cheating, it’s not. It’s using the tools. As you play with it, you’ll likely over do it at first.  With a little practice you’ll be creating even better pictures in post production.

You’ll also see that makeup issues can be fairly easily resolved. Even those who are very challenged at make up will find the post production tools can really change the image nicely. I do urge a little caution.  Don’t over do it, and practice a while before you decide to post anything online.

Take a look at this video of our favorite singer, Boggie. It takes a lot of courage to say, ‘hey, this is what they do to me to make me look good.’ She’s been quite outspoken about the way the media manipulate models to present them in an unrealistic manner. She’s a courageous campaigner and remarkable performer.  I like to remind people what they see in many cases in the media is not real. It’s creative, doubtless, but we don’t need to hold ourselves to that standard. We are at our most beautiful when we accept ourselves as we are and create ourselves as we desire.

I hope you’ve enjoyed this series. Feel free to let me know.

😊

Fiona.

Join my Premium Program today.

Selfies For Crossdressers – Part 7.

Forever Ashley – Ashley Baron.

Just as positioning the lights produces a variety of effects, the camera angle (and distance from the subject) can result in effects that are both surprising and can improve your selfie radically.

In a head and shoulder shot, if shot from higher up it exaggerates the size of the eyes and shortens the face a little.  Shooting from one side, or slightly to one side, gives the face depth and a little more of a three-dimensional look. A low angle can exaggerate the chin or add chins (urgh). There’s good reason why most selfies are shot from higher than level, and slightly to one side.

If you are able to use a self timer and a tripod, you can shoot full length.  You’ll find that shooting from lower down gives the effect of lengthening the leg and making you a bit taller.

Make sure your lens is clean, and if you’re using a tripod or clamp to hold the camera be sure to give yourself plenty of time on the self timer.  Don’t know how to find the self timer? Easy – just type the name of your phone or camera into Google and then self timer. It will come up in a moment.

Many cameras and phones have a degree of curvature in the lens. You can see if there’s much curvature in your lens by finding a view of any grid like image and photograph it. Lenses on more expensive cameras are becoming increasingly true. Phones are not always quite so true, though.  This can result in some interesting effects.  Too close and a profile will result in a larger nose than you’d think. It’s a better idea to shoot from slightly further away and zoom in a little. Using the zoom effect can reduce lens curvature.

Beware of the zoom!  The moment you start to use the zoom you increase the risk of camera shake being problematic and can result in a little blur. There’s two ways to combat this. The first is to use a tripod or a clamp to hold the camera or phone steady.  The second is a little more tricky.  Here’s what you do:

  1. Change the ISO setting (film speed) to at least 400 but better 800.
  2. You will find that this makes the shutter speed much faster and as a result most movement is locked solid, though the image will be slightly grainy and lower contrast.
  3. Add a little flash to freeze the image completely.

As ever, if you don’t know where to find the ISO setting for your particular phone, simply google it. Same with how to turn on the flash.  It’s all out there on the net, regardless of the phone or camera.

🙂

Fiona

Selfies for Crossdressers – Part 6.

Costume and make up

The irrepressible Ashley Baron

You’re a crossdresser! Of course, the clothing is of paramount importance. However, it’s no excuse to play it safe.  If you have the time, really thinking about the selfie – giving it a theme or presenting a specific character is a great idea.

Our 2019 winner of the Crossdresser Of The Year Award was Ashley Baron. Ashley loves Cosplay and has brought entertainment to countless thousand dressing as feminine superheros. She puts enormous energy into the presentations and doubtless has a lot of fun doing this.

Others, such as Monica, research an aspect of visual art and then expand on the theme. The way you present yourself in your picture is an opportunity to be expressive and creative. You can have a lot of fun with coming up with characters or exploring ideas such as a sexy schoolgirl look, or even doing Fiona, in the style of the 1920’s. There’s no end to costume possibilities.

Monica excels in themed elegance.

A note of warning.  Try not to be something it’s impossible to be. I will never (again) be able to dress like a 16 year old schoolgirl. I will dress very well as a woman of my own age, though.  It’s likely I will get a better picture in a costume that fits with that premise.

When putting your look together if you need ideas check out my Pinterest ( https://www.pinterest.ca/fionadobson22/ ). Or you could take a look at http://CrossdressingForFun.com – which is more like a style magazine for crossdressers. You’ll  notice that the best pictures on Pinterest are always the simplest ones. Could be something in that!

It’s nice to take the time to do your make up carefully. Photography can be a little unforgiving, however you’ll find that some of the tools I discuss later will help you get past any minor issues. However, taking your time and really learning to enjoy the preparation for the photograph is going to improve the end result. A happy crossdresser is, after all, a better photographer than an unhappy crossdresser.

Wigs can really help create an exciting and interesting look. While going out clubbing on a hot night makes wearing a wig uncomfortable, using one while shooting selfies is no hardship and often improves the image.  It’s also a great area to experiment in.  Even using low quality wigs when having some fun doing selfies is a great idea. 

Selfies For Crossdressers — Part 5.

Part 5 – Lighting.

Bernard was nearly giving himself a hernia as he lifted a heavy light into position in the studio. 

“You really should be more careful,” I said as he finished positioning it. “You could do yourself a nasty injury lifting those lights.”

I was applying a deep red nail polish to my toes, and as he turned on the lights they reflected pleasingly, and I was enjoying a moment of contented relaxation, disturbed only by his wheezing and puffing as a result of his exertions.

Bernard really should chill out, with his heart problems and everything. Still, I have told him – but if he will ignore my advice… You see, you can only help people who want to be helped. My healing nature is wasted on him.

Once upon a time photographers were all about natural light versus artificial light. The famous pictures of Vivian Leigh auditioning for her role in Gone With The Wind required the genius Angus McBean to use no less than 43 separate light sources to create what at first glance looked like natural light.   https://www.npg.org.uk/collections/search/portrait/mw111962/Vivien-Leigh

These days things are a little different.  Instead of using complex light metering techniques it’s easier just to take the shot and see how it turns out.  If necessary you can make another and adjust a few settings if you really feel the need.  Of course, today it doesn’t cost $25 each time you hit the shutter. That’s a close approximation to what each frame would have cost someone using a large format camera in the 1940’s. The cost of film, processing and printing was the limiting factor.

Today’s phones and cameras are so far ahead in every respect that there’s no good reason not to try and secure that great shot.  The only limitation is really your own imagination.  Nonetheless, playing with lighting sources can be fun, and looking at experiments can give a great creativity to your pictures.

When the camera tells you to use flash, it can be precisely the time not to use any artificial light at all.  Having a tripod helps keep the camera still, and you may need to for longer exposures (when the shutter automatically remains open longer enough to get a decent image). Also, using longer exposures can give some great effects. Turning off flash, and doing a selfie by a road with busy traffic at night can result in some great effects as car lights leave a scar across the image. Experimenting with low light pictures can give you unexpectedly great pictures.  A little experience and you start to get the images you want.

Rather than thinking “flash or no flash”, let’s also think about some of the things you can do with flash. Putting a little colored tissue over the flash will give a color cast over the things that the flash reaches – such as yourself.  If you’re going to do this then consider the clothes you’re wearing.  A plain white blouse will reflect the color of a flash filter very nicely. Don’t be too surprised if your face comes out with some weird cast though.  A cool trick for this is to shoot with a color filter on the flash (tissue or gel works) in a nightclub where there are lots of other light sources.  It can provide a feel to the pic that otherwise would have been missing.

If you prefer to work only with daylight, then be aware of a common misconception.  While photographs in bright sunshine can be crystal clear they will always have more harsh shadows than a picture taken on a slightly overcast day. Many portraits are diminished by the hard shadows of a bright sunny day. Photographs taken when the sky is a little more forgiving are often more complimentary.  Equally, photographs taken late in the day, when the light is slightly flatter and cast with the color of the sunset can be far more interesting. Using flash on a bright summers day sounds unusual, however it has the effect of reducing the shadows and softening the face. Sometimes you’ll hear this referred to as fill in flash, or forced flash.  You’ll also find that this eliminates camera shake effectively.

Ashley regularly displays her proficiency with light.

Knowing your equipment is one of the easiest ways to improve your photographs.  If you are ever in doubt how to turn on the flash and use it to punch in extra color and light simply Google it. It’s a very useful technique to master.

A final word about lighting.  Using lights that happen to be around the place can be a very cool way to get interesting effects.  Fluorescent lights often give a green cast that’s not that attractive. However, some lights use a bulb that gives a pleasant and gentle light. Often desk lamps and standard lamps are not very powerful, but don’t let that deter you from experimenting.  There’s a lot of mileage and some great images taken just by arranging the available lights in a creative manner.

Years ago I used to shoot for The Guardian. Yes, there’s a little nugget for you. I did a great deal of work on the arts pages. I have shot more than my fair share of ballerinas. Calm down… I would often take subjects to one of the final places in London to use gas lighting, The Inns Of Court in the legal district of The City Of London. The effect, when shooting at 2 AM, was that my subjects skin would appear creamy soft because of the strange nature of these archaic lights.

A great way to experiment with lighting is to use a darkened room and use the desk lamp and none other.  Do a shot in the path of the light, and then take a look at it. Pay attention to the color of the light as it is rendered in the image – which may be different to what you believe you are seeing when it’s not a photo.  As you add additional lights the blending of the colors and shadows will change.  The key is to experiment. Once you find a lighting set up that really works, make a note of it and try doing a few different poses and costume styles with it.

When using two lights, think of one as the primary light and the other as a secondary light.  Positioning the secondary light lower can have the effect of flattening the skin a little and removing some wrinkles. Experimenting with the balance of the lights, moving one forward and one further away, will give you a variety of effects.  When you find something that’s working, be sure to make a note of the combination so that you can use it with other costumes later.

The best thing you can do is experiment with lighting styles – artificial and natural. Be fearless in your use of light. It will shine through in your photography.

Join my Premium Program today.

Selfies For Crossdressers — Part 4.

Composition.

Monica – Simple and tasteful.

Selfies are pretty simple. However, like all things that are simple there’s often more to them than meets the eye. When you think about getting that really great shot you will be more likely to succeed if you’ve planned it a little first, and follow one or two simple guidelines. As you do this more regularly it will become second nature.

Throughout this process you’ve been hearing me suggest you want to keep it simple. Well, we have one main rule – the rule of thirds. The idea is simple enough. Imagine a ‘#’ or a grid you’d use in tic tac toe. Where the lines intersect is where you want to put your main point of focus. This works well whether you shoot horizontal (landscape) or vertical (upright). The second rule is equally easy. Always have a main point of focus, and no more than two other details that draw the eye away.

As a side note, these days many people shoot with the idea of a square image, as Instagram has popularised this format. It’s extraordinary that it’s become so popular when you consider that newspapers and magazines have tried to make it popular for the last hundred years, without success. Layout artists have always liked the idea of a square format, but up till now it’s never really caught on. So, now we have Instagram. Well, the rule of thirds works equally well in a rectangle or a square. So, try keeping it in mind as you set up that perfect shot.

With these two guidelines you are set. Yes, it’s really that simple.  In a close up the eyes and mouth present three focal points. In a head and shoulders image, the face, and often the shoulders form the three points.  And in a full length image you may be looking for the primary focus to be yourself, and the secondary two points being two ornamental accessories.  Monica uses this to great effect in her images.

Sebastian, my personal trainer, tells me he listens to the space between the notes in music. This is, I suspect, because he is a pretentious idiot at times. However, the idea of leaving space in your image does give it a pleasant effect and can be extremely effective. Equally, if you are looking for an extremely busy looking active image then crowding it can achieve that effect. You may want to try experimenting with these two options and see which works best for you.

You can do a few practice shots without make up or costume to get a general idea of how the image will look in the frame. Then go and get into something you’d like to wear and take some time. Put on a little makeup – don’t over do it. Enjoy a glass of wine. And finally, sit down and do a few more practice shots using the set up that gives you the best results. Be sure to look out for keeping the horizon lines straight and not to much tilt – unless this is specifically an effect you’re looking for. Try not to leave too much space above the head, or below the feet. Nicely centred images always look great.

Now, you probably think you’re done.  You’re not.

Once you’ve got the best shot identified, try it again. And again.

Finally, you’ve got something to work with.

Join my Premium Program today.

Selfies For Crossdressers — Part 3.

Props.

Monica is a talented model with an eye for simplicity and good taste. Her blog is HERE.

There’s a few issues we face as crossdressers. One of the first things we need to get over is the fact that our hands are slightly bigger than female hands. Props can help us with this.

A common trick among those who take great selfies is either to obscure the hands, or to use oversize props. This includes large wine glasses, very large rings or other ornaments.  A large bracelet or necklace also has the effect of slimming and reducing the apparent size of a subject.  Looking out for props and accessories like this is a great idea long before you take the shot you’re looking for. Keeping an eye open for interesting objects that you can use for this is a great idea, particularly if you like to do garage sales or antique stores.

Other things that can be brought into play very easily include a nice fabric or dress that can be draped over your hands to obscure them, black tight gloves, which tend to make hands look a little slimmer, and even holding an object such as a soccer ball or vase. I find it’s generally a good idea to stay away from guns or sharp objects.  It can send the wrong message, as several Re[publicans have learned with their unbelievably bad taste Christmas Cards in recent years. I hope none of my lovely members have such poor taste.

When you think about it, you probably want an image that will convey calm serene beauty (see Monica). If you’re able to ensure that objects in the image reflect this idea you’re off to a great start. Probably don’t need a chainsaw as a prop.

Just between you and I, the greatest prop of all is just a little bit of luck. Enjoy the video below.

Selfies For Crossdressers — Part 2.

Location.

The number of people that fall from high buildings while taking selfies in stupid places is really quite alarming. Not only for the subject, but also for anyone entering the building at ground level at the time. I strongly advise that you avoid doing any selfie in a place in which there is a risk that you might fall, or have someone fall on you. Instead, let’s keep this simple.

Far better that you choose a safe and tidy location in your own home. It’s a good idea to take a photograph of the location before you take the selfie you’re looking for. Look at the image and decide if the background is really what you want. Is it clean? Is it tidy? Is there a dead animal sticking out from under the bed?

A poor quality background can drastically impact your image. Usually the best backgrounds tend to be the simplest ones. Complex patterns and complicated shapes often detract and pull the eye away from the key aspects of the image. Some of the best selfies use a very simple plain white background, such as a wall. I tend to suggest keeping it as simple as possible, though an easy way to add a little color is to hang a sheet or other colored material from some string. A plain curtain can serve the same purpose.

When you’re thinking about backgrounds, it’s important to take a look at how much space you have. It’s a good idea not to stand too close to a wall or curtain, as this will cause shadows to be visible, particularly if you are going to use a little extra lighting or a flash. Even a standard desk lamp angled toward you can add a touch of additional lighting that softens the shadows on your face. When setting such a situation up, try and leave enough space not to have the shadows immediately visible on the background.

If you are going to use a lamp to add additional light be sure it’s not too cold a color. Each type of bulb has a different color light. LEDs tend to have a very flat and cold light. Older lightbulbs often cast a warm light that can be very flattering. For an unusual effect, you can even drape a colored tissue or plastic over the light. If you do so, make sure it’s not going to catch fire as this can have a detrimental effect on your photoshoot. Taking a selfie with a handsome fireman as he lifts you from the burned out wreckage of your apartment is not considered a win. Neither is this considered a good way to meet new friends.

Now, if you’re wondering what kind of idiot takes photos of themselves before falling out of windows, or setting fire to their apartment, I should point out that I have over 75,000 members of varying degrees of intellect and ability. Darwin rightly pointed out that there are some genes not destined to remain in the gene pool for long. Having said that, to date I don’t think we’ve lost any members to this unfortunate fate. So far, at any rate.

The delightful Ashley Barron — Read my interview with here here — https://fionadobson.com/beautiful-ashley-baron/

Another consideration is the basic question of ‘indoors or outdoors’. Indoors gives you far more control over the set up, however shooting outdoors can provide far better lighting. Contrary to popular belief, a bright sunny day outdoors is not often the best time to do a selfie. Slightly overcast cloud cover provides a flatter more even lighting with less contrast and harsh shadows. A warm tinge can be added later by adjusting the color balance slightly, if that’s a goal. Additionally natural light tends not to shift colors, while artificial light can have unexpected effects. Old fluorescent lights, for example, cast a slightly green light, which really does a number on your skin. In the words of Lennon and McCartney, ‘It ain’t easy being green’. (Ed. I think that was Kermit The Frog).

A useful technique is to do a selfie in a doorway, shooting from the outside into the house. This has the benefit of natural light, while also having the complimentary benefit of leaving the background (the interior of a building) a little dark. The overall effect is to lift the primary subject (you) and leave the background a little less distracting. The same thing can be achieved by sitting in a wndow, and having the shot taken from outside. The natural light illuminates you nicely, while the interior of the room fades in darkness.

A quick note about background colors. If you are going to be wearing hard and vivid colors a white or black background will likely work very well. If you plan to wear soft muted shades, think more about trying to find a soft color to use in the background. While white is always a good default color a cream or pale lemon is likely to give your skin tones a good chance to stand out nicely. Generally speaking, for crossdressers soft pastel colors are going to work well. They are non-threatening and comfortable. If you’re set on a very dramatic look, dark tones may be the way to go.

For a moment try thinking of it as an art director in an advertising agency might. If the look you wish to project is Arachnia, Bitch Queen Of The Night, then pale shades of rose and cream are unlikely to be the way to go. Black, red and metal shades are more likely the order of the day. One might also think of shooting it in black and white — but more of that later. If you’re looking for a more gentle image such as Millicent the innocent school teacher, black leather and chain mail may be a little unsuitable. Pale blues and lace are more likely to score.

While these are suggestions, and a good starting point, as you become more practiced you may want to experiment with your own ideas. There are certainly great selfies that go completely against these guidelines. Nevertheless, this is a great way to start. And, after all, now you’re actually thinking about the picture, aren’t you?

Selfies For Crossdressers – Part 1

Selfies For Crossdressers – Part 1

Introduction.

I’ve always loved photography. From the early days, when I worked for a local wedding photographer, to more recent years working in an advertising agency, I’ve never been far from a lens and shutter. And now as a crossdresser with a love of photography I am very happy to bring a few tips and tricks, suggestions and stories, that you may find of value. If you enjoy them be sure to comment and share them.

Fiona 

– http://FionaDobson.com

Equipment.

As Bernard unloaded the car, and I sat beside it on one of his large trunks full of gear while drinking a mimosa, I smiled at him and said, “Goodness, Bernard! I had no idea your equipment was so very large!”

I lifted my phone, made sure the bright sunshine was bouncing off my upturned cheeks, beamed at the screen and took a quick selfie. A moment later it was shared on my Snapchat to my children and shared it to Instagram.

“It’s not getting any easier to haul about the place with age,” said Bernard. “My back
” he groaned as he moved another heavy case.

I poured a little more Champagne into my glass, and lay back on the trunk.

“You really should take it easy, Bernard,” I said. “Didn’t you have heart surgery recently?”

“Oh, yes,” he groaned. “I’m recovering. Slowly.”

I looked at the enormous collection of photography gear Bernard required for the shoot we were preparing, and then checked my Instagram and was tickled to see that I’d got a handful of likes already. 

A few moments later a minivan pulled up at the location and three young models climbed out, chattering away and looking anorexic.

“Mimosa and a sandwich?” I asked.

“Just a drink please,” said one. 

“Oooo
 Mimosa’s” said another.

“I never would have guessed,” I murmured and poured the drinks.

You’d think that as a crossdresser in an advertising agency with numerous fashion clients, I’d get a good deal of free clothing. Far from it. Most of the free clothes are size two and hang off the models as though they’ve been in a famine for the last year. I’d not say that I envy the models their figures, but the filthy bitches are always getting the free stuff from the clients I work so hard to service (Ed: phrasing).

But all of this is quite by the way. I’m really trying to illustrate the fact that in spite of Bernard’s enormous equipment (Ed: phrasing) today there’s really no need to have particularly complex camera equipment. Most modern phones are more than capable of taking great pictures, and even today’s cheap cameras are capable of rendering crystal clear images. If one is shooting pics for a 60 foot high poster on the side of the building you’re going to need more professional equipment. However, for a picture that’s going to be used online or in a 5 x 7 inch enlargement, you really don’t need complex photography gear.

Ashley Barron — Our CD of the Year recently (https://fionadobson.com/happy-new-year-and-congratulations-to-ashley-our-new-crossdresser-of-the-year/) — is a selfie master.

For the purposes of this series I’m going to assume you are using a simple camera, or a typical smart phone. Iphones, Samsungs and most other smart phones are quite adequate for our purposes.

A selfie stick, a phone holder with a suction cup or a tripod with clamp for a cell phone is also recommended, though by no means essential. And finally, I’ve always found that a roll of duct tape always comes in useful, even if it’s just to tape any critical mouths shut. It also doesn’t do any harm at all to include a bottle of wine among your essential supplies. You may need it.

Just for a moment, going to the subject of phones and cameras. This is going to sound obvious, but there’s a lot of people who overlook a simple thing. If you do want to manipulate the settings on your phone it’s really very simple to learn how. For most of what we’ll do you really don’t need to do much in the way of changing settings, however, should you wish to your first stop should be to type the name of the phone, the model and then ‘exposure settings’ into Google. You’ll find instructions for most phones immediately come up, unusually with a simple set of additional information regarding the other settings you can manipulate. Nothing mentioned in this document should be beyond the reach of the average user of a smart phone. If it is, there’s always the wine.

Part 2 will be out in 3 days.


We’d like to introduce you to Hannah.

I’d like to introduce one of our favorite new friends from Germany, Hannah. Now, you may have seen her in various social media channels, but here she is dressed wonderfully, and presenting a number of selfies.

When Hannah’s selfies came through on email it was all I could do to pry them off young Max. That boy is becoming quite obsessed! I sometimes think he spends too much time alone with his computer. I think it may be affecting his health, and as I said to Julie – “he always seems so breathless after checking out the images.”

Hannah has been dressing since she was very young, and she now works in IT and is feeling like an increasingly confident young lady. Age 22, she’s developed a lovely confident look and has a fresh approach to life.

We’d love to hear more from Hannah, and will be sure to keep you updated.